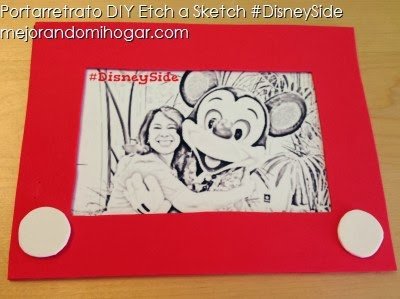
How to make a Etch a Sketch picture frame. This is an easy craft for kids that could work for a Toy Story themed birthday party.
This was a collaboration with Disney Home Celebrations and HP Photo Paper. Check out the Spanish version here: Como hacer un portarretrato de Etch a Sketch
A few days ago we had a Toy Story-themed birthday party. The kids made some crafts including this Etch a Sketch picture frame. I had my guests taking a picture and we printed them with HP photo paper.
We had a great time making the frames. Check out the video and written how-to instructions to make the frame.
If you want so save time, you can cut out the material parts ahead of time and have them ready for the kids to put it togheter.

Etch a Sketch Picture Frame
Material
- 4″ X 6″ photo frame (to make the mold)
- Rule
- Foam Red and White
- Scissors
- Hot Glue
- Hot glue gun
- Pencil
- Magnet (optional)
You can use a photo frame to draw the rectangle mold/pattern on cardboard.
Place the mold over the red foam cut two pieces in the red foam. Cut out the center on one of the rectangles, this is where the photo will go (4″ X 6″).
Glue the two rectangles on three sides, leaving the top side with no glue so you can slide the picture when finished.
Cut two quarter-size white circles in the white foam to make the buttons.
Glue the white circles to the lower sides of the Etch a Skecth photo frame.
You can place a magnet behind the frame if you wish.
The photo frame is ready!
I hope you enjoy making this Etch a Sketch picture frame!
Leave a Reply